
A theremin is an electronic musical instrument controlled without any physical contact from the musician. It is named after it’s Russian inventor, Leon Theremin. The device was patented in 1928. Here he is demonstrating his invention:
In project 6 of the Arduino starter kit we build a theremin that uses a photoresistor to measure light input, then convert that data into an audio signal that will sent to a piezo speaker for audio feedback.
In the setup there is a loop that takes the first five seconds after loading to record the higher and lowest value that the photoresists records to determine the range. (sensorHigh & sensorLow). So we can play with using a really bright desktop lamp to see how much variation we can create.
In the loop function of the project code, we get the light sensor data and figure out where it is in the rage from low to high as defined in the setup. Then we find the same proportional place meant in the preset frequency range. We do this using the map() function.
map(value, fromLow, fromHigh, toLow, toHigh)
We then use the tone() function to generate a square wave of the specified frequency. The UNO has a frequency(Hz) range of 31 to 65535. Humans have an average hearing range of 20 to 20,000 hertz.
tone(pin, frequency, duration)
Here is the complete project:
In my research I found that there is a limitation with the tone command in that only one tone can be generated at a time. If a tone is already playing on a different pin, the call to tone() will have no effect. If the tone is playing on the same pin, the call will set its frequency. If we want to play different pitches on multiple pins, we will need to call noTone() on one pin before calling tone() on the next pin.
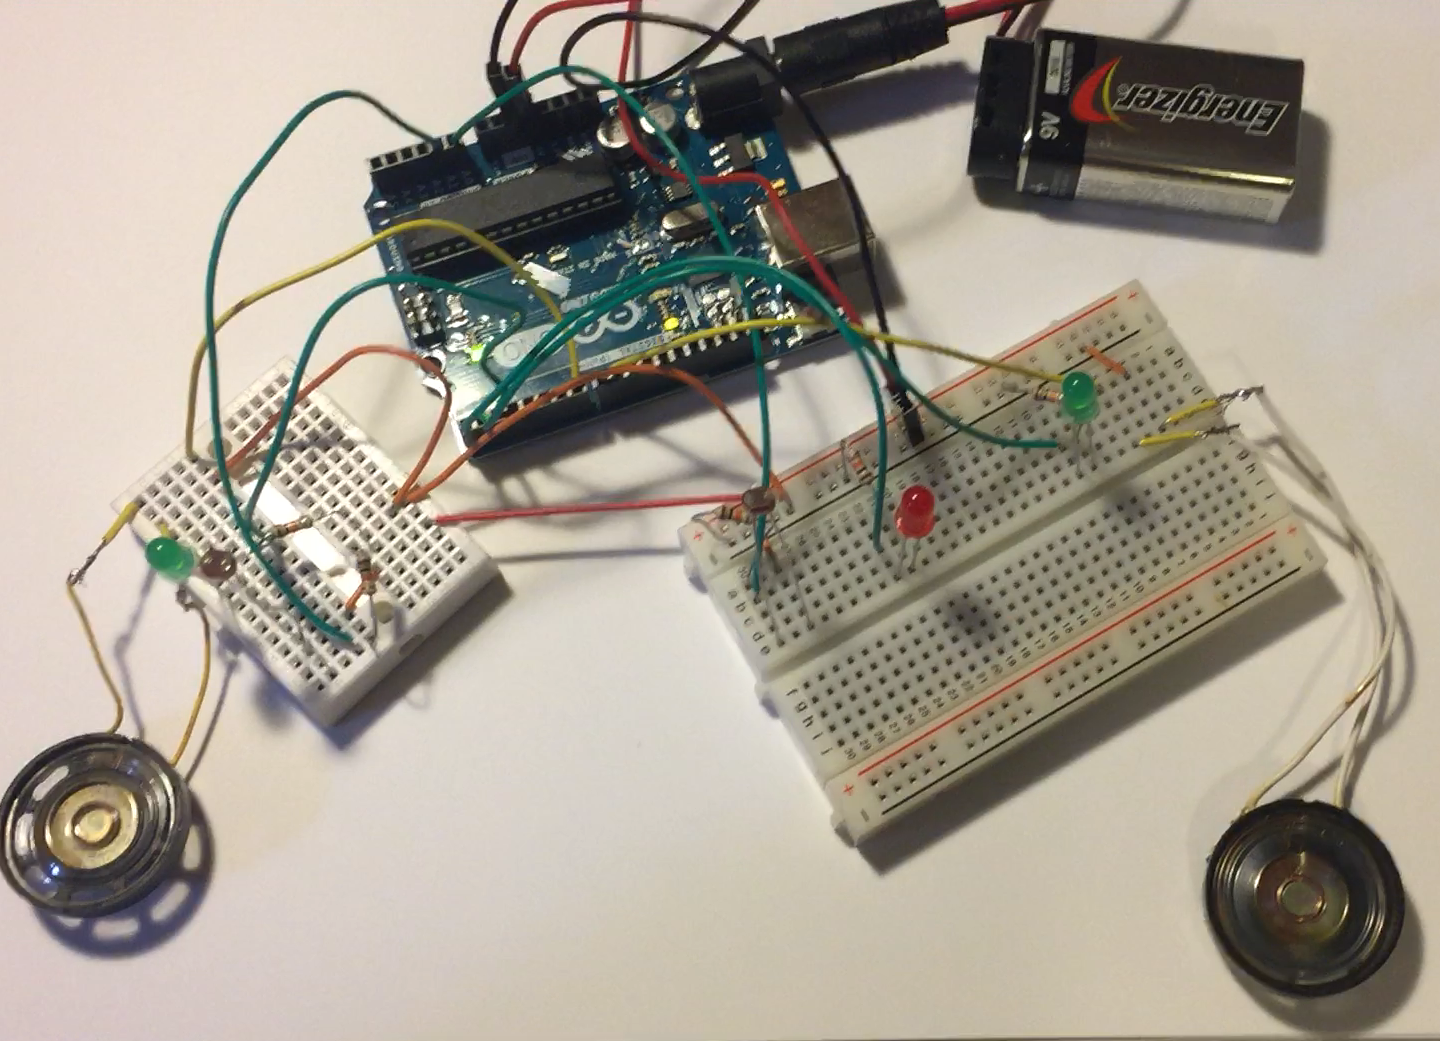
I have two small speakers that I found and am going to use two photoresistors and try to create a light theremin capable of playing two tones simultaneously.
With that working, I want better notification for the setup process, so I added in a red led and two green legs. The red led will flash 5 times before the setup process, stay light with grabbing the sensor data, flash 5 more times to signify the setup is complete, then turn off for the duration.
Once we are in the loop the green lights next to each speaker will turn on and off as the tone is being sent to that speaker.
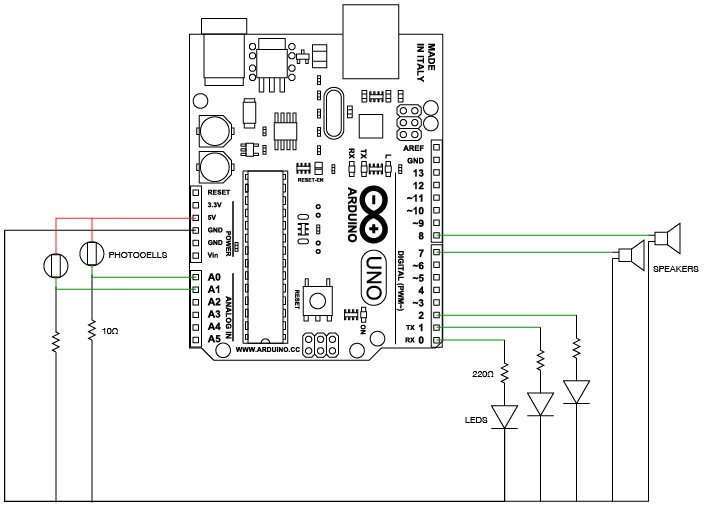
And here is the final code and schematic:
See the Pen Arduino: 2 speaker light theremin by Troy Finamore (@findes) on CodePen.
What else can we do with this? How about an on/off button? Or what if we use the potentiometer instead of one of the light sensors, or as a volume knob?